
The octagon picnic table offers significant benefits to the classic picnic table design. The octagon design not only seats more people, the space between the seats makes it easier to sit down and get up.
Of course it's a matter of personal opinion, but we could say the octagon design is simply more beautiful and sophisticated than the traditional long straight picnic tables with benches along the sides.
The Octagon Picnic Table is superior to the traditional picnic table design in a number of ways. It seats eight adults in comfort as opposed to six for the traditional classic six foot picnic table with attached benches. The open seat design makes it easy for your guests to sit down and get up without inconvience to the guest sitting next to them. The octagon shaped top puts the food within easy reach of everyone. Also, everyone is in a more convenient arrangement for conversation.

Please note that there is no PDF file for these Octagon Picnic Table plans. You can either view these plans in your shop with your phone or mobile device or print a paper copy of this web page with your printer.

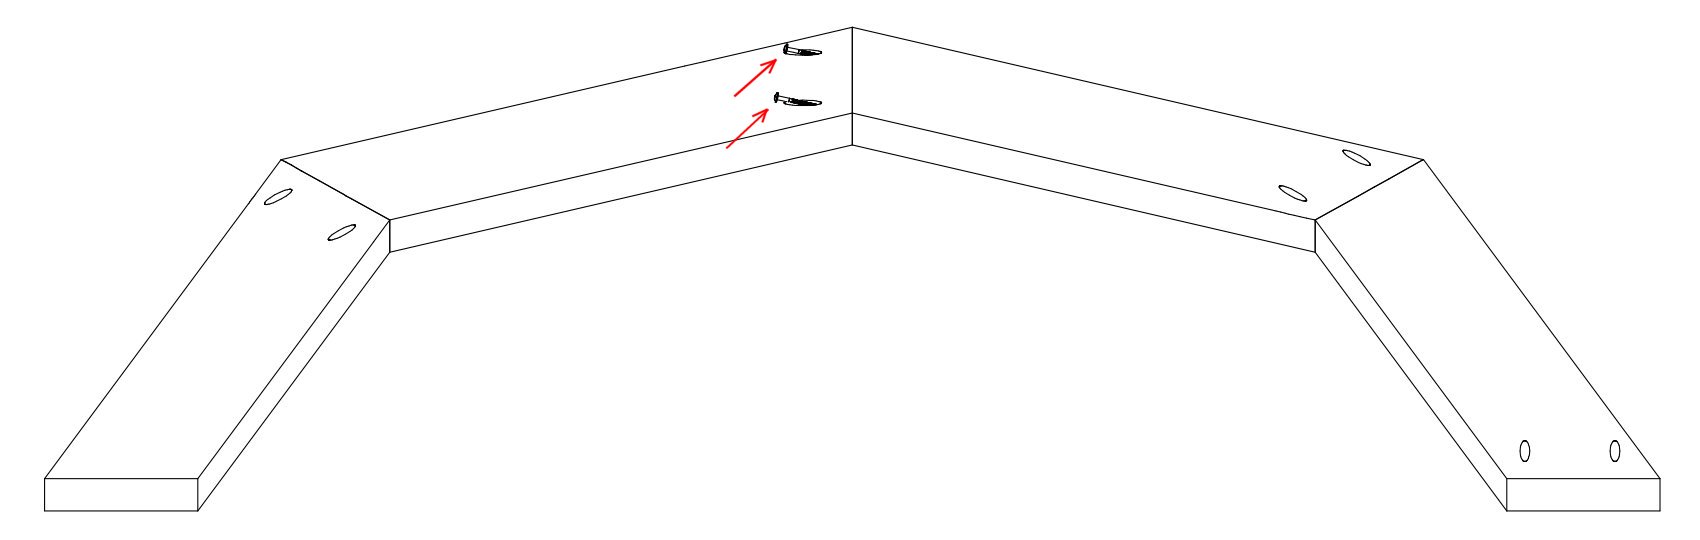
Assemble two octagon segments together as shown above. Clamp both pieces so they fit together properly and secure the joint with 2” pocket hole screws. You will need to assemble four pairs of segments like these.
Next, arrange the assembled pairs of segments together as shown above. Again, clamp both pieces together and secure the joint with 2” pocket hole screws.

Finally, arrange and clamp the segments together as shown above and sewcure with pocket hole screws.

Position the Narrow Gussets on the bottom side of the Top Octagon Segments as shown above. Ensure the Octagon Segments are equally spaced from each other and the Gussets are centered over the octagon joints and also centered side to side. Secure the Gussets to the octagons with 2 1/2" rust resistant screws

Position the Wide Gussets as shown above. The Wide Gussets should be positioned against the Narrow Gussets where the Narrow Gussets come together in the center of the Top as indicated by the red arrows. Attach the Wide Gussets to the octagons with 2 1/2" rust resistant screws.

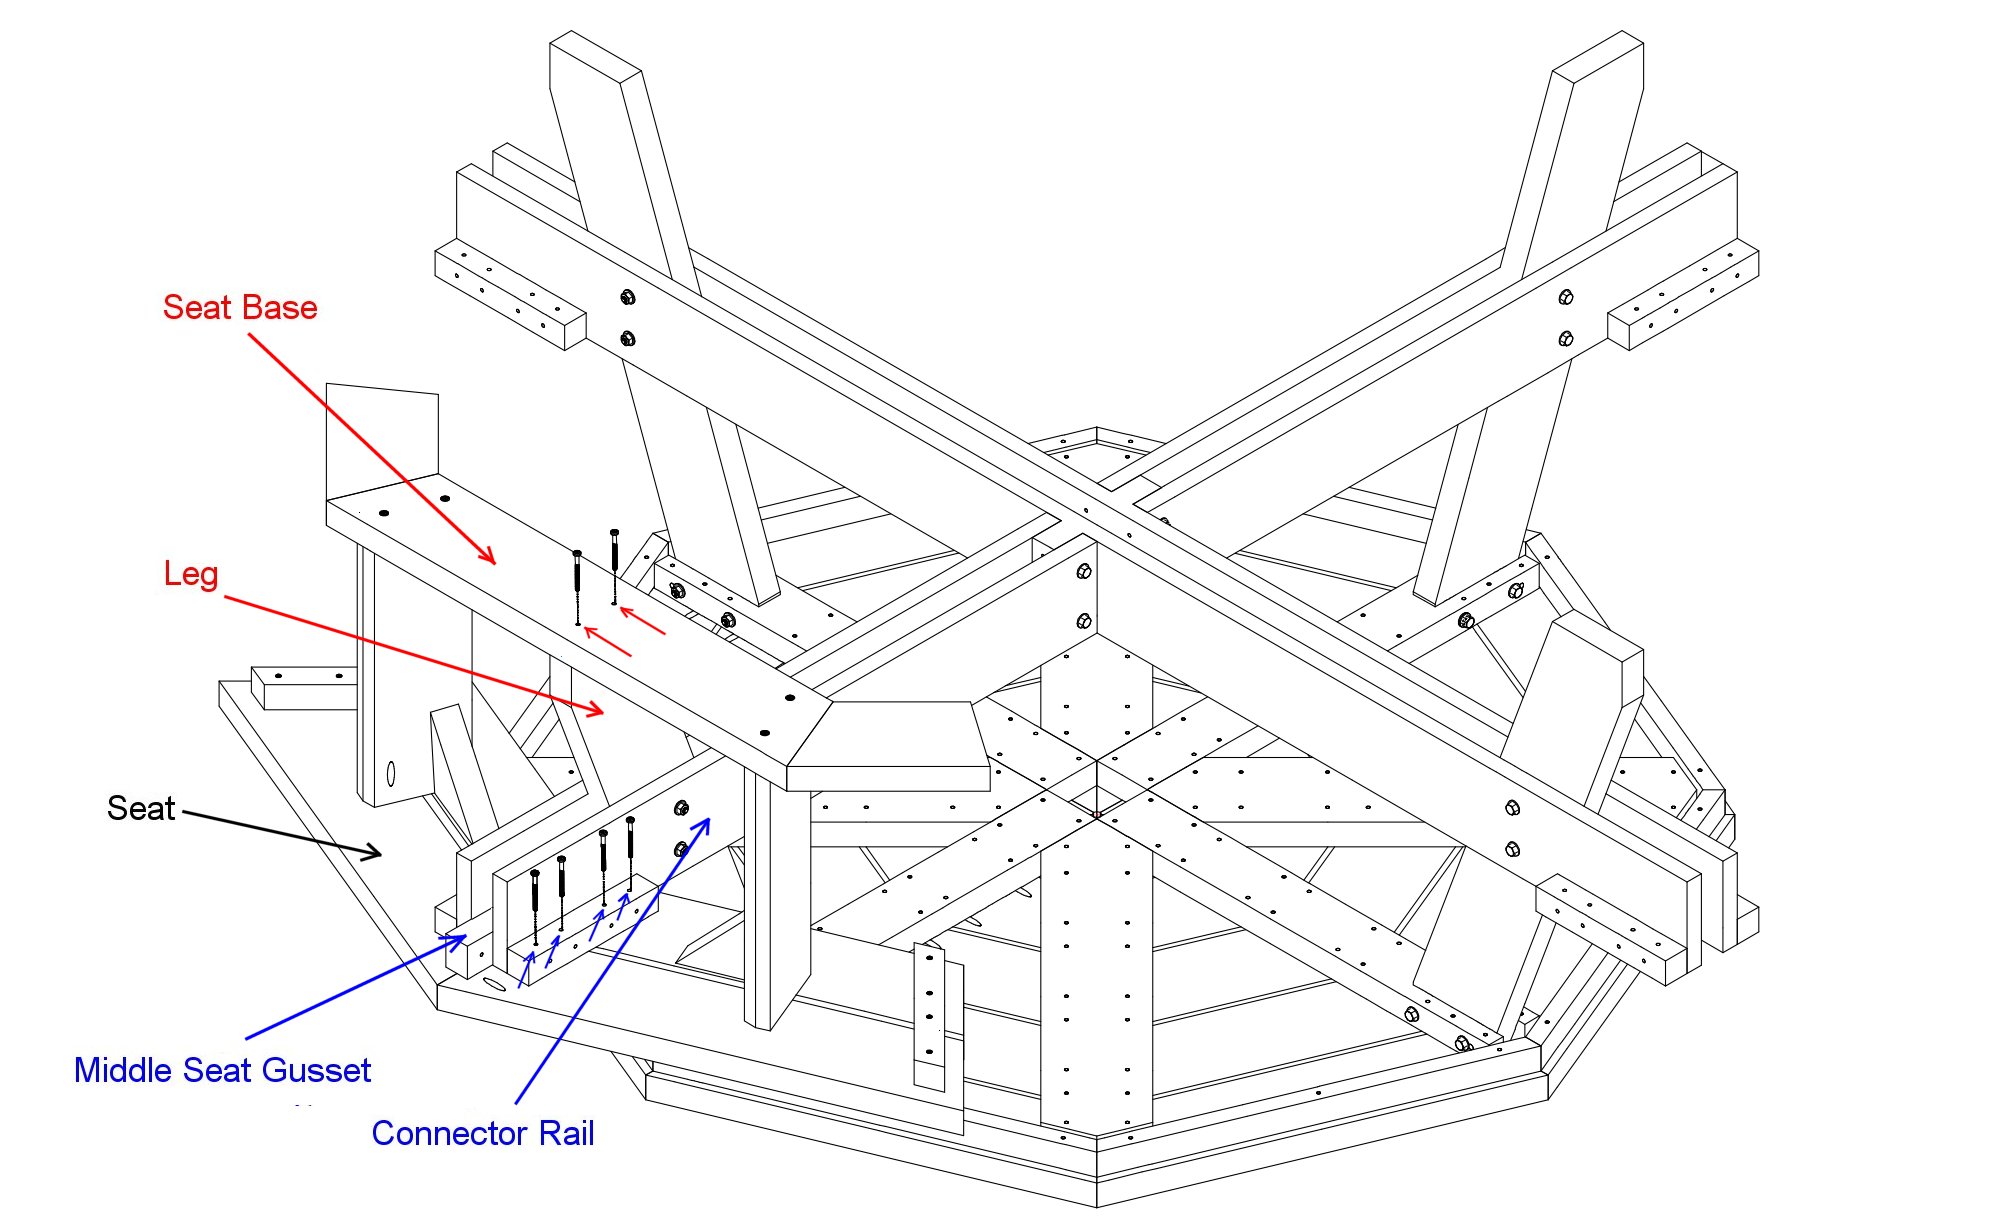
Attach the legs to the Narrow Gussets with 4" bolts, two flat washers, one lock washer, and nut as shown in the drawings. Do not completely tighten the nuts until the Picnin Table is completely assembled.

Attach a Connector Rail Gusset to each Long Connector Rail with two 2 1/2" wood screws as shown in the drawings above. The Connector Rail Gussets must be centered from end to end of the Connector rails.


Position the eight Top Trim pieces so they are evenly spaced and centered on the top. Attach with three 2 1/2" screws as indicated by the red arrows in the drawing above.

Clamp the seat boards so they fit together properly and secure them together with 2" pocket hole screws as indicated by the red arrows in the drawing above.

Position the seat boards so there is a 3/8" gap between them. Attach the end and center seat gussets with 2 1/2" screws as shown above.

Clamp the Seat Base boards and Base Extensions so they fit together properly and secure them together with 2" pocket hole screws as shown in the drawing above.

Position the Seat Posts on the bottom side of a set of seat boards as shown above. The edge of the Seat Post should be 2" from the end of the Gusset as shown in the Detail View. Attach the Seat Posts to the assembled seat boards with pocket hole screws as indicated by the red arrows above. Choose screws of a length that will not protude past the Seat surface on the opposite side.
Next, place an assembled Seat Base on top of the Seat Posts as shown above. Determine the location for the screw holes and drill two 3/16" holes through the Base Extensions as indicated by the blue arrows. The screw holes should be centered over the ends of the posts. Attach the assembled Seat Bases to the bottom ends of the Seat Posts with 3" screws.

This completes the assembly section of our Octagon Picnic Table plans.